-40%
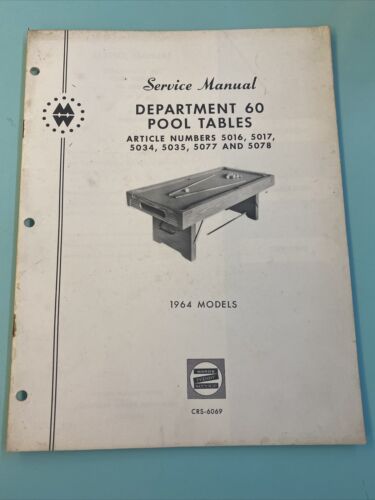
1964 Montgomery Ward Pool Table Manual CRS-6069
$ 15.83
- Description
- Size Guide
Description
Condition is very good.Service Manual
DEPARTMENT 60
POOL TABLES
ARTICLE NUMBERS 5016, 5017,
5034, 5035, 5077 AND 5078
1964 MODELS
WARDS
repair
service
CRS-6069
POOL TABLES
CHAPTER I
IDENTIFICATION
There are six Models of Department 60 Pool Tables in the 1964 Model Year which were manufac-
tured by Recreation Products, Inc., source coded ERX. The Article Number of each Model is
stamped on the bottom of the bed.
----------- 2 -----------
INSTALLATION
CHAPTER ||
INSTALLATION
Every table has customer instructions for setting up and leveling these tables and the customer is
expected to perform this operation.
LEVELNESS
Professional pool tables weighing up to 2, 000 lbs, and costing up to , 000 use slate for the table
beds.
This inorganic material is not affected by atmospheric conditions such as heat and moisture.
Home pool tables can not use slate because of weight and cost considerations. Instead, a moisture
resistant molded board is multibraced with wood bed-braces and construction is designed to resist
atmospheric conditions. Proper adjustment of leg and bed levelers, when necessary, will restore
the bed to maximum levelness.
LEG LEVELING
SEE DETAILED ASSEMBLY INSTRUCTIONS, THIS IS EXTREMELY IMPORTANT.
If one leveler is off, it can cause a misroll of the ball, If two (2) diagonal leg levelers are either
high or low it can cause a length-wise diagonal crease of the playing surface causing the ball to
roll to the side or to the center. Although the bed has been leveled at the factory, it must be very
carefully readjusted to the floor on which it will be played. A 24" carpenter's spirit level will be
required.
BED LEVELING
SEE DETAILED INSTRUCTIONS,
This must be done if there is still misalignment of the bed after
the leg-leveling operation.
LOOSE CLOTH
Occasionally, the cloth may stretch and wrinkle due to absorbing moisture. This can be remedied
by running a hot iron over the cloth to its original tautness. It can also be accomplished by un-
screwing the rail cushions, pulling the cloth taut in the length and width, and refastening with
staples or thumb tacks.
LOOSE POCKET LINERS
This should be considered an ordinary and expected problem throughout the life of the pool table
and can be easily reattached with staples or small round head nails.
NOTE - The playing bed surface has been protected with a white protective paper. To remove,
tear across the table between center pockets and then pull each half toward the center of the table.
Remove any small parts by hand. DO NOT USE KNIFE OR SCISSORS. Small bits of paper under
cushions can be removed with eyebrow tweezers.
DETAILED ASSEMBLY INSTRUCTIONS
STEPS IN ASSEMBLING POOL TABLE
The Pool Table is completely assembled with the exception of securing the legs to the table and
leveling the bed
It takes at least 2 people to correctly set up the pool table.
----------- 3 -----------
TO REPLACE TOP CLOTH OR BED
1.
Remove all cushions.
2.
Remove end and side rails.
3.
Remove staples securing cloth to bed and remove cloth.
Use staple gun or small flat head nails to tack replacement cloth to bed, as in Figure 26.
Attach one end (1) and stretch tightly and secure to opposite end (2). Attach one side (3)
between corner pocket and side pocket and diagonal opposite side (4), then stretch opposite
sides (5 and 6) and secure.
4.
Use one staple or nail in each place indicated in order shown on
Figure 26, being sure to stretch cloth tightly at each point. When cloth is secured and no
wrinkles or slack spots appear, tack cloth all around the bed.
5.
Final step is to cut the cloth, as shown in Figure 27 so that cloth may be folded around each
pocket opening and both glued and tacked underneath the bed.
6.
Replace rails, cushions and pockets.
